
Kinder Bueno Cheesecake!
This post may contain affiliate links of which we earn a small commission should you choose to purchase through them. This helps us to keep the site running. Thank you for your support
When I was thinking of cheesecake recipes (I’m having a real thing for cheesecake at the moment), I was wondering what sweets I could use and what would taste good but not too heavy. I was looking for something somewhat indulgent, a crowd-pleaser and something to excite people.
With that in mind, I couldn’t think of anything better than a no-bake Kinder cheesecake recipe!
Kinder sweets are some of my favourites and seem a popular choice among all ages so why not create some Kinder Bueno recipes, starting with this one.
If you live in the UK, I found this wonderful hazelnut white chocolate spread in Morrisons which tastes just like the Kinder Bueno sauce/cream in the middle and it’s delicious but I have seen plenty of similar products floating around the internet.
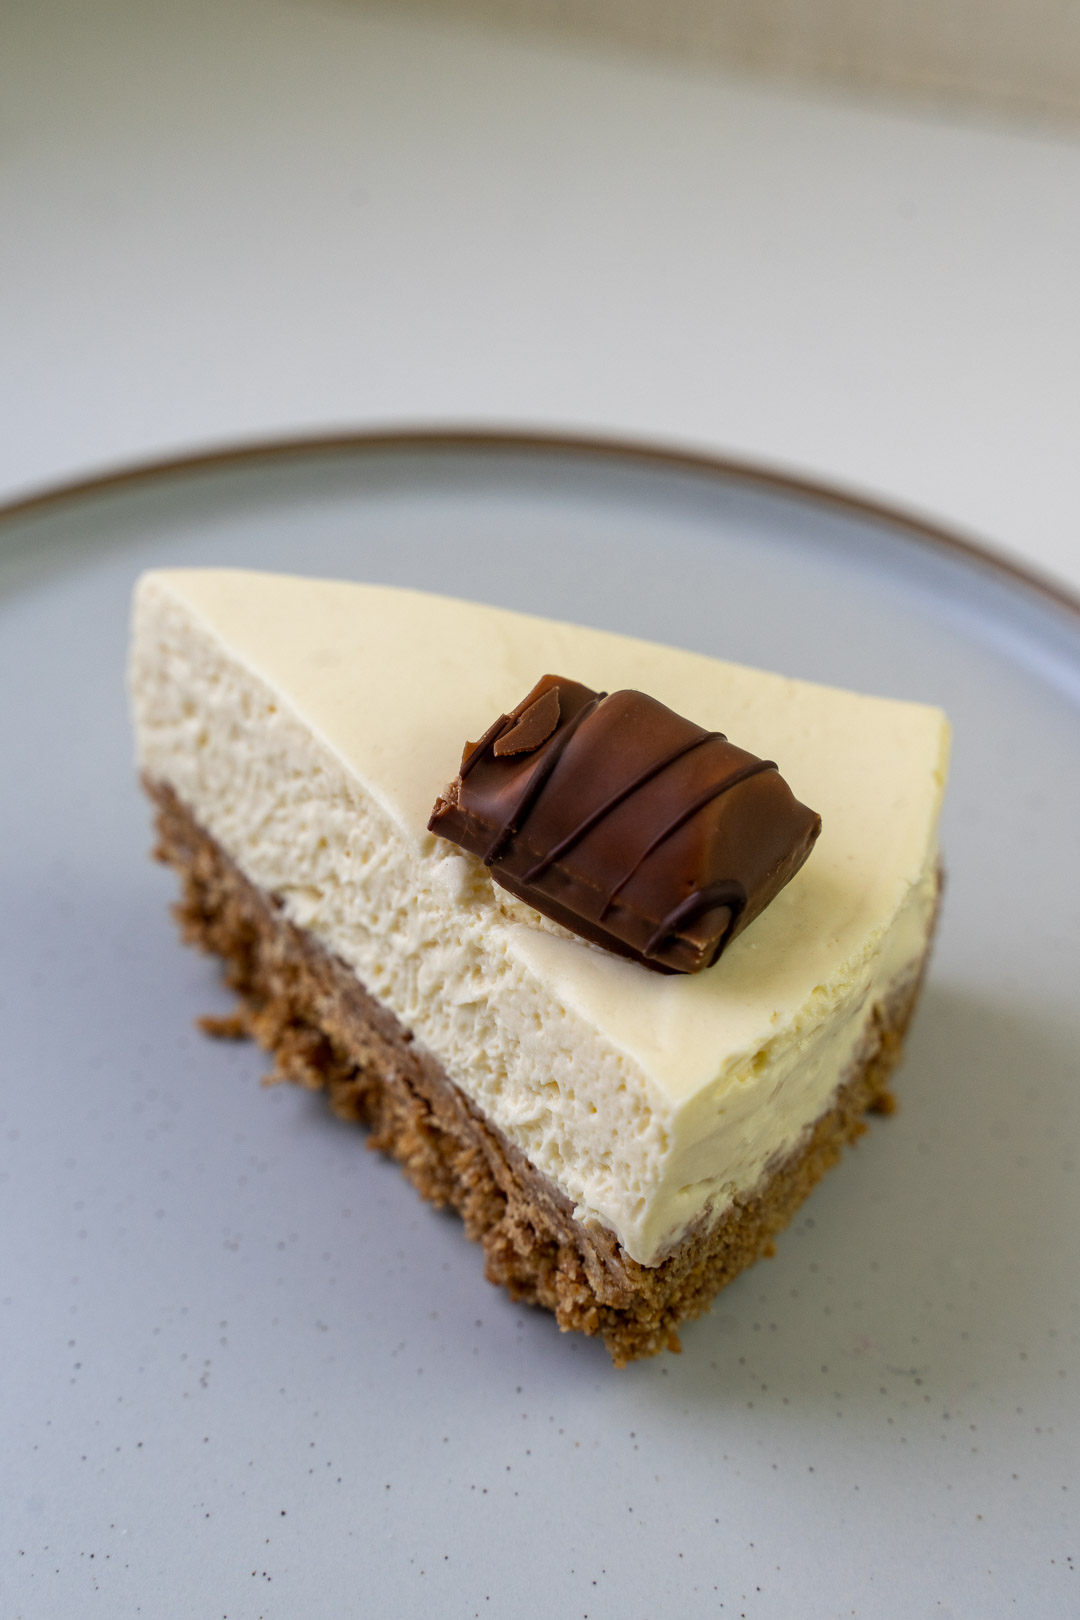
This spread is what I chose to mix in with the cheesecake filling so it has that lovely smooth, sweet and hazelnut taste throughout along with the chocolate biscuit base and I threw some individual Kinder Bueno pieces on top for decoration. A grown-up take on a Bueno dessert!
Read below for my Kinder Bueno cheesecake recipe!
Kinder Bueno Cheesecake Recipe
Overview
Serves: 10-12
Prep time: 20 mins
Cook time: 6 hours (preferably leave overnight)
Total time: 6 hours 20 mins
Ingredients
- 300g Digestives (Graham crackers)
- 150g unsalted butter
- 600g full fat cream cheese
- 100g icing sugar
- 300ml double cream
- 200g hazelnut white chocolate spread
- 2 tbsp cocoa powder
- 3 Kinder Bueno
Utensils
- Scales
- Large mixing bowl
- Whisk
- 20cm deep springform tin
- Spatula
- Parchment paper

Instructions
- Take your 300g Digestives and place in a zip lock bag before taking a rolling pin to smash them into a fine crumb.I prefer to use this method as it is somewhat therapeutic in my eyes!
Alternatively, you can use a blender/food processor in short bursts to do this.
- Once your biscuits have been crushed into a fine crumb, add 2 tbsp cocoa powder and shake your bag around or mix again.I like to use the Dr Oetker Fine Dark Cocoa Powder but be careful not to add too much as it is very rich.
If you feel the mix doesn’t look dark or chocolatey enough, do not worry as this will happen once the butter has been added! Do not be tempted to continue adding cocoa powder!
- Melt your 150g unsalted butter and before adding both broken biscuits and melted butter to a bowl and mixing together.This is when you will see that rich chocolate colour!
- I like to add some parchment paper to the bottom of my cake tin before locking the top on and this is just to make it easier to remove the cheesecake once it has set.Once you have added the parchment paper, pour your buttery biscuit mix into the centre of the tin and begin to spread it evenly.
You want this to be quite densely packed so you may like to use your hands or the bottom of a glass to do this.
- Place your biscuit base into the fridge to cool and set for approximately 1 hour.
- Add your 600g cream cheese and 100g icing sugar to a clean mixing bowl and begin to whisk.At this point, you are looking for a smooth consistency with no lumps.
It should only be a gentle whisk required at this stage.
- Next, add your 300ml double cream and around 200-250g hazelnut white chocolate spread to the mix before whisking further.Personally, I would add around 200g for a smoother and more understated flavour, unless you would prefer it to be much richer.
You are looking for a thicker consistency once the cream and spread have been added.
You want this mix to be more firm and create soft peaks when the whisk is removed.
- Add your cheesecake filling to the biscuit base and smooth with your spatula before placing in the fridge once again to cool and set.If you can, leave this to chill overnight but I would advise leaving this for 6 hours at a minimum!
- Once set, feel free to decorate with your Kinder chocolate bars!Enjoy!
Storage
Keep refrigerated and eat within 3-4 days for best taste.
No Bake Kinder Bueno Cheesecake Recipe

Kinder sweets are some of my favourites and seem a popular choice among all ages so why not create some Kinder Bueno recipes, starting with Kinder Cheesecake.
Ingredients
- 300g Digestives (Graham crackers)
- 150g unsalted butter
- 600g full fat cream cheese
- 100g icing sugar
- 300ml double cream
- 200g hazelnut white chocolate spread
- 2 tbsp cocoa powder
- 3 Kinder Bueno
Instructions
- Take your 300g Digestives and place in a zip lock bag before taking a rolling pin to smash them into a fine crumb .I prefer to use this method as it is somewhat therapeutic in my eyes! Alternatively, you can use a blender/food processor in short bursts to do this.
- Once your biscuits have been crushed into a fine crumb, add 2 tbsp cocoa powder and shake your bag around or mix again. I like to use the Dr Oetker Fine Dark Cocoa Powder but be careful not to add too much as it is very rich. If you feel the mix doesn’t look dark or chocolatey enough, do not worry as this will happen once the butter has been added! Do not be tempted to continue adding cocoa powder!
- Melt your 150g unsalted butter and before adding both broken biscuits and melted butter to a bowl and mixing together. This is when you will see that rich chocolate colour!
- I like to add some parchment paper to the bottom of my cake tin before locking the top on and this is just to make it easier to remove the cheesecake once it has set. Once you have added the parchment paper, pour your buttery biscuit mix into the centre of the tin and begin to spread it evenly. You want this to be quite densely packed so you may like to use your hands or the bottom of a glass to do this.
- Place your biscuit base into the fridge to cool and set for approximately 1 hour.
- Add your 600g cream cheese and 100g icing sugar to a clean mixing bowl and begin to whisk. At this point, you are looking for a smooth consistency with no lumps. It should only be a gentle whisk required at this stage.
- Next, add your 300ml double cream and around 200-250g hazelnut white chocolate spread to the mix before whisking further. Personally, I would add around 200g for a smoother and more understated flavour, unless you would prefer it to be much richer. You are looking for a thicker consistency once the cream and spread have been added. You want this mix to be more firm and create soft peaks when the whisk is removed.
- Add your cheesecake filling to the biscuit base and smooth with your spatula before placing in the fridge once again to cool and set. If you can, leave this to chill overnight but I would advise leaving this for 6 hours at a minimum!
- Once set, feel free to decorate with your Kinder chocolate bars!
Nutrition Information:
Yield:
12Serving Size:
1Amount Per Serving: Calories: 663Total Fat: 55gSaturated Fat: 28gTrans Fat: 0gUnsaturated Fat: 23gCholesterol: 109mgSodium: 237mgCarbohydrates: 38gFiber: 3gSugar: 26gProtein: 8g
Pin this recipe


This is so yummy, too nice in fact as I keep having extra slices. It does taste similar to kinder beuno and Im addicted. Cant wait to make it again
What size cake tin did you use for this recipe?
Hi Shannon,
I usually use an 8″ tin!
I have also used the same quantities and used a slightly smaller tin for a thicker base/topping and it works well too.
Lauren